
In one of our last blogs we informed you that Windows 10 free upgrade offer will be expiring July 29th 2016. What we didn’t tell you was how to install Windows 10 and get the upgrade on your current Windows 7 or 8 computer.
If you haven’t installed Windows 10 on your PC before, you’ll have to perform an upgrade first before you can execute a clean install. If this doesn’t make any sense, that’s because Microsoft never makes licensing easy, even when there’s a free version.
Once you’ve performed the upgrade and activated your Windows 10 upgrade on your PC; Microsoft will associate your unique hardware ID with an activated Windows 10 license. You can reinstall as you see fit but not until you’ve upgraded Windows 7 or 8 to Windows 10 and then activated.
Now before we begin, I cannot stress enough that you need to backup your files and folders before upgrading. 9 times out of 10, the upgrade goes smoothly and everything is intact when you are complete. All the files are there, applications got installed and you are stress free and content. But if you are that 1 time out of 10 where things do not go smoothly; you can’t get your files & applications and you just upgraded to Windows 9.6, almost Windows 10 but not quite. At this point a clean install is the only way to install Windows 10, and all files may be lost. So that is why we stress to please always backup everything before proceeding with any major install.
Here are the simple steps on How to Install Windows 10:
Step 1: Backup…Backup…Backup
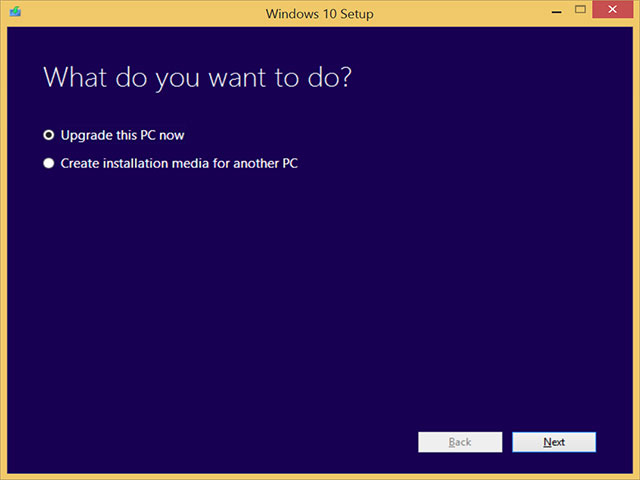
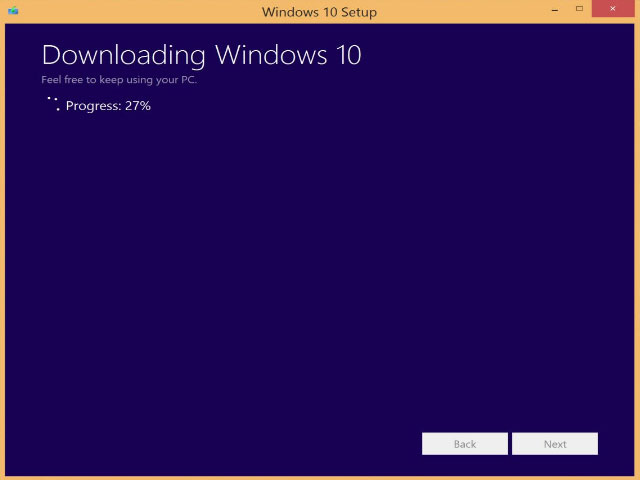
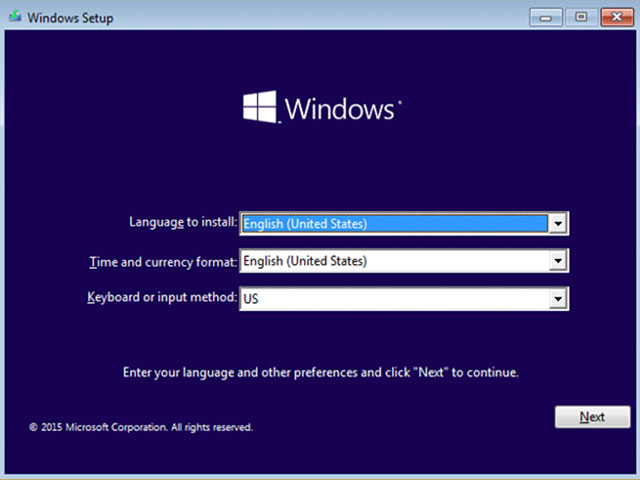
Step 2: Visit Microsoft’s Windows 10 Website. Here you can verify if your computer qualifies for the upgrade. Once you qualify, you can download the install to a USB, DVD or ISO if needed. Alternatively you can download the web installer by clicking on the Upgrade now button from the same page and just choose “Upgrade this PC now”, which is the easiest option.
Step 3: If you are installing on a regular PC with Windows already on it, you’ll be prompted immediately to start the upgrade process.
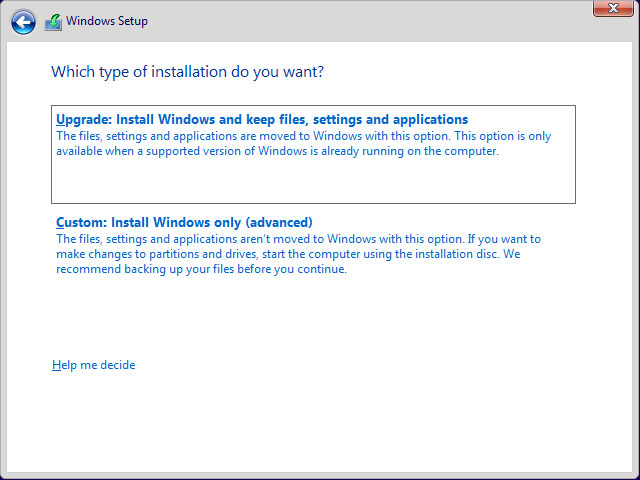
Step 4: The install process mostly consists of clicking the Next button, making sure to choose Upgrade when prompted. Note: A valid Windows license key for 7, 8, or 8.1 is needed in order to perform the upgrade.
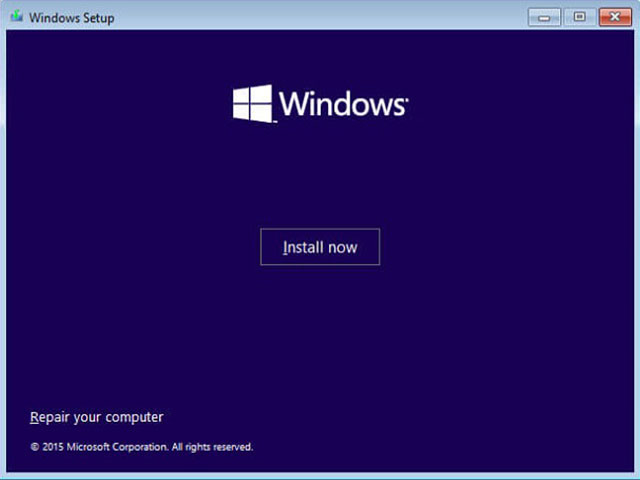
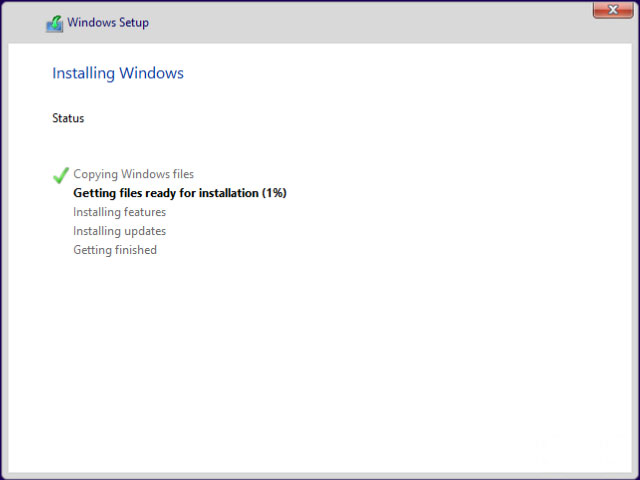
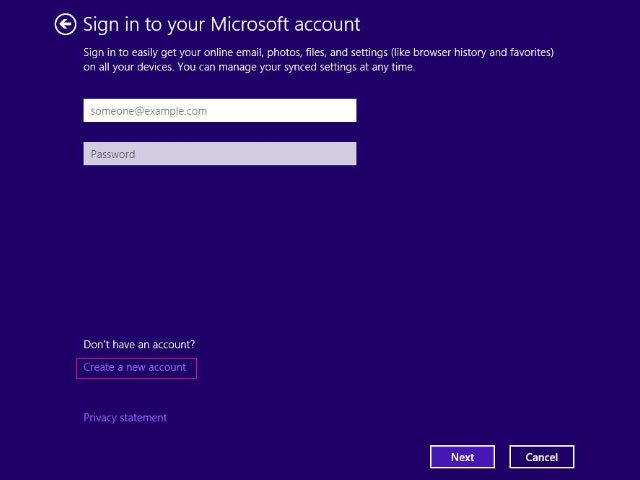
Sounds simple enough, but there are a few more steps involved in upgrading. Here are some screen captures of what you might expect through your upgrade journey….

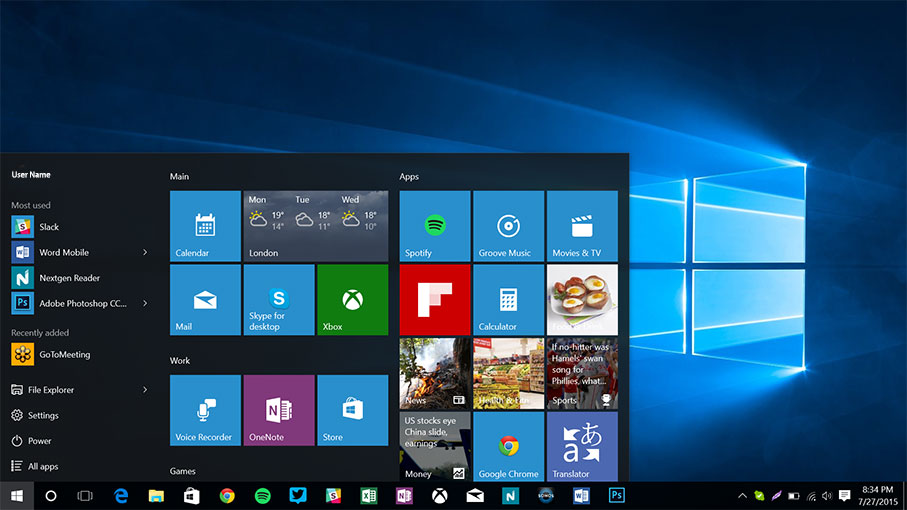
Start using Windows 10
Now that you have completed your guide on How to Install Windows 10, and everything is installed correctly you are ready to click on the Start button and go.
But before you click on that Start button, let me tell you something. Microsoft might have changed a few things as far as how Windows 10 looks and feels. Okay Microsoft has changed everything, let’s be honest! Take your time while poking around your new Windows install. There are some major changes but also some very interesting features added for you to check out as well.
Your IT Support Provider or Managed Service Provider will be able to help you with this upgrade. If you don’t have an IT Support Provider or Managed Service Provider for your home or business, AllCore has an IT support solution for you. We would be happy to help you through this process; backing up your files, upgrading to Windows 10 and training on how to navigate through Windows 10.