Everyone has a busy schedule and you might only be able to find time to write your blog posts at odd hours of the day. However, making them live at those times will not attract your optimal audience. Or maybe you punch out a few posts at a time and you do not want to post them all at one time so what do you do?
WordPress allows you to schedule your posts to auto-publish them at a later date or time. You can also remove an existing post and republish it at a specific time and date. Below we will cover the steps on how to go about doing this.
How to Schedule a WordPress Blog Post
1.
WRITE A BLOG POST
Write your blog post or open up a post you previously saved.
2.
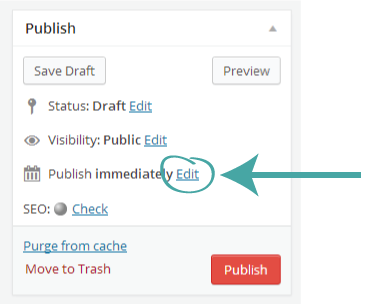
EDIT “PUBLISH” OPTIONS
In the Publish module to the right of the post editor, click the blue “Edit” link next to Publish immediately.

3.
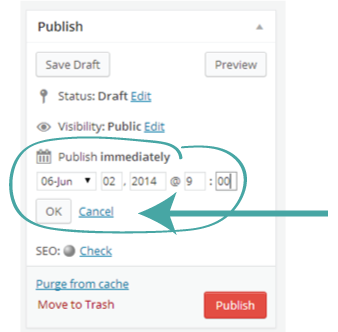
Set Date and Time
Set the optimal future date and time to publish your post and click “OK”. To schedule a post in the PM, you will need to use the 24-hour clock. For example, 1:00 PM would read as 13:00 in the Schedule a Post module. The time will be based on your location settings in your Settings > General page section of your site.

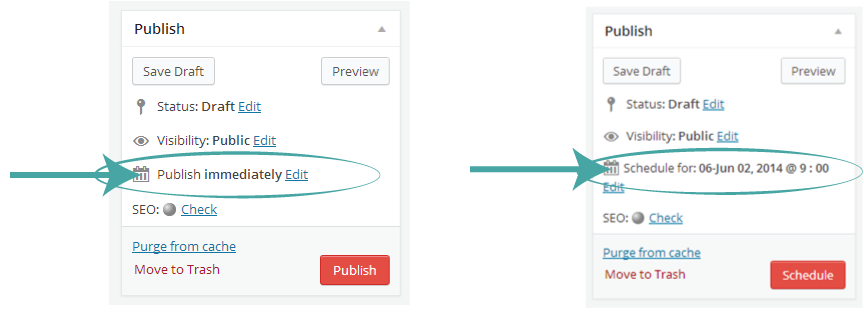
Instead of Publish immediately, it will now say Schedule for: followed by the date and time you specified, and the button has changed from Publish to Schedule.

4.
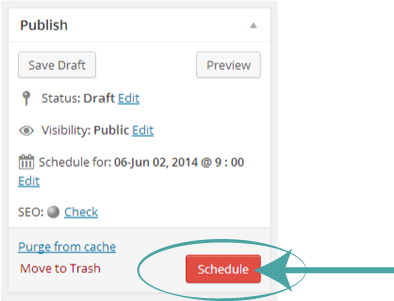
Schedule Your Post
Click “Schedule”. Your post is now scheduled to go live on the date and time you set.

As you can see, it is very simple to schedule your blog posts. It is an extremely helpful feature within WordPress; allowing you to plan ahead which is great if you’re away from your blog for an extended period of time.
Scheduling your posts can also help you adopt a regular posting schedule and build a loyal following. Posting regularly at specific times, allows your followers to know when to expect a new post to be live. I hope this tutorial helps you to easily schedule and maintain your blog posts.

